> For the complete documentation index, see [llms.txt](https://docs.live2.ai/llms.txt). Markdown versions of documentation pages are available by appending `.md` to page URLs; this page is available as [Markdown](https://docs.live2.ai/integration/magento.md).

# Magento

After you’ve published the section layout on the Live2.ai dashboard and copied the Embed ID, follow these steps to integrate it into your Magento store and make the embed live:

## Video Tutorial: Integration Guide

{% file src="/files/xF6LYGDzTryyNqApZRwf" %}

## Detailed Walkthrough

## Extension Installation Guide

### Step 1: Install Live2.ai Module

To begin, open your terminal and use Composer to add the Live2 extension to your Magento project by running:

```
 composer require live2/live2
```

This command fetches and installs the Live2 module into your Magento setup.

### Step 2: Install Codebase and Database Schemas:

Next, you need to install the codebase and update the database schemas. Run the following commands sequentially in your terminal:

```php
php bin/magento setup:di:compile
php bin/magento setup:upgrade
php bin/magento setup:static-content:deploy -f
php bin/magento indexer:reindex
php bin/magento cache:clean
php bin/magento cache:flush
```

These commands will compile the code, update the database, deploy static content, reindex data, and clear caches.

### Step 3: Update Authorization Token

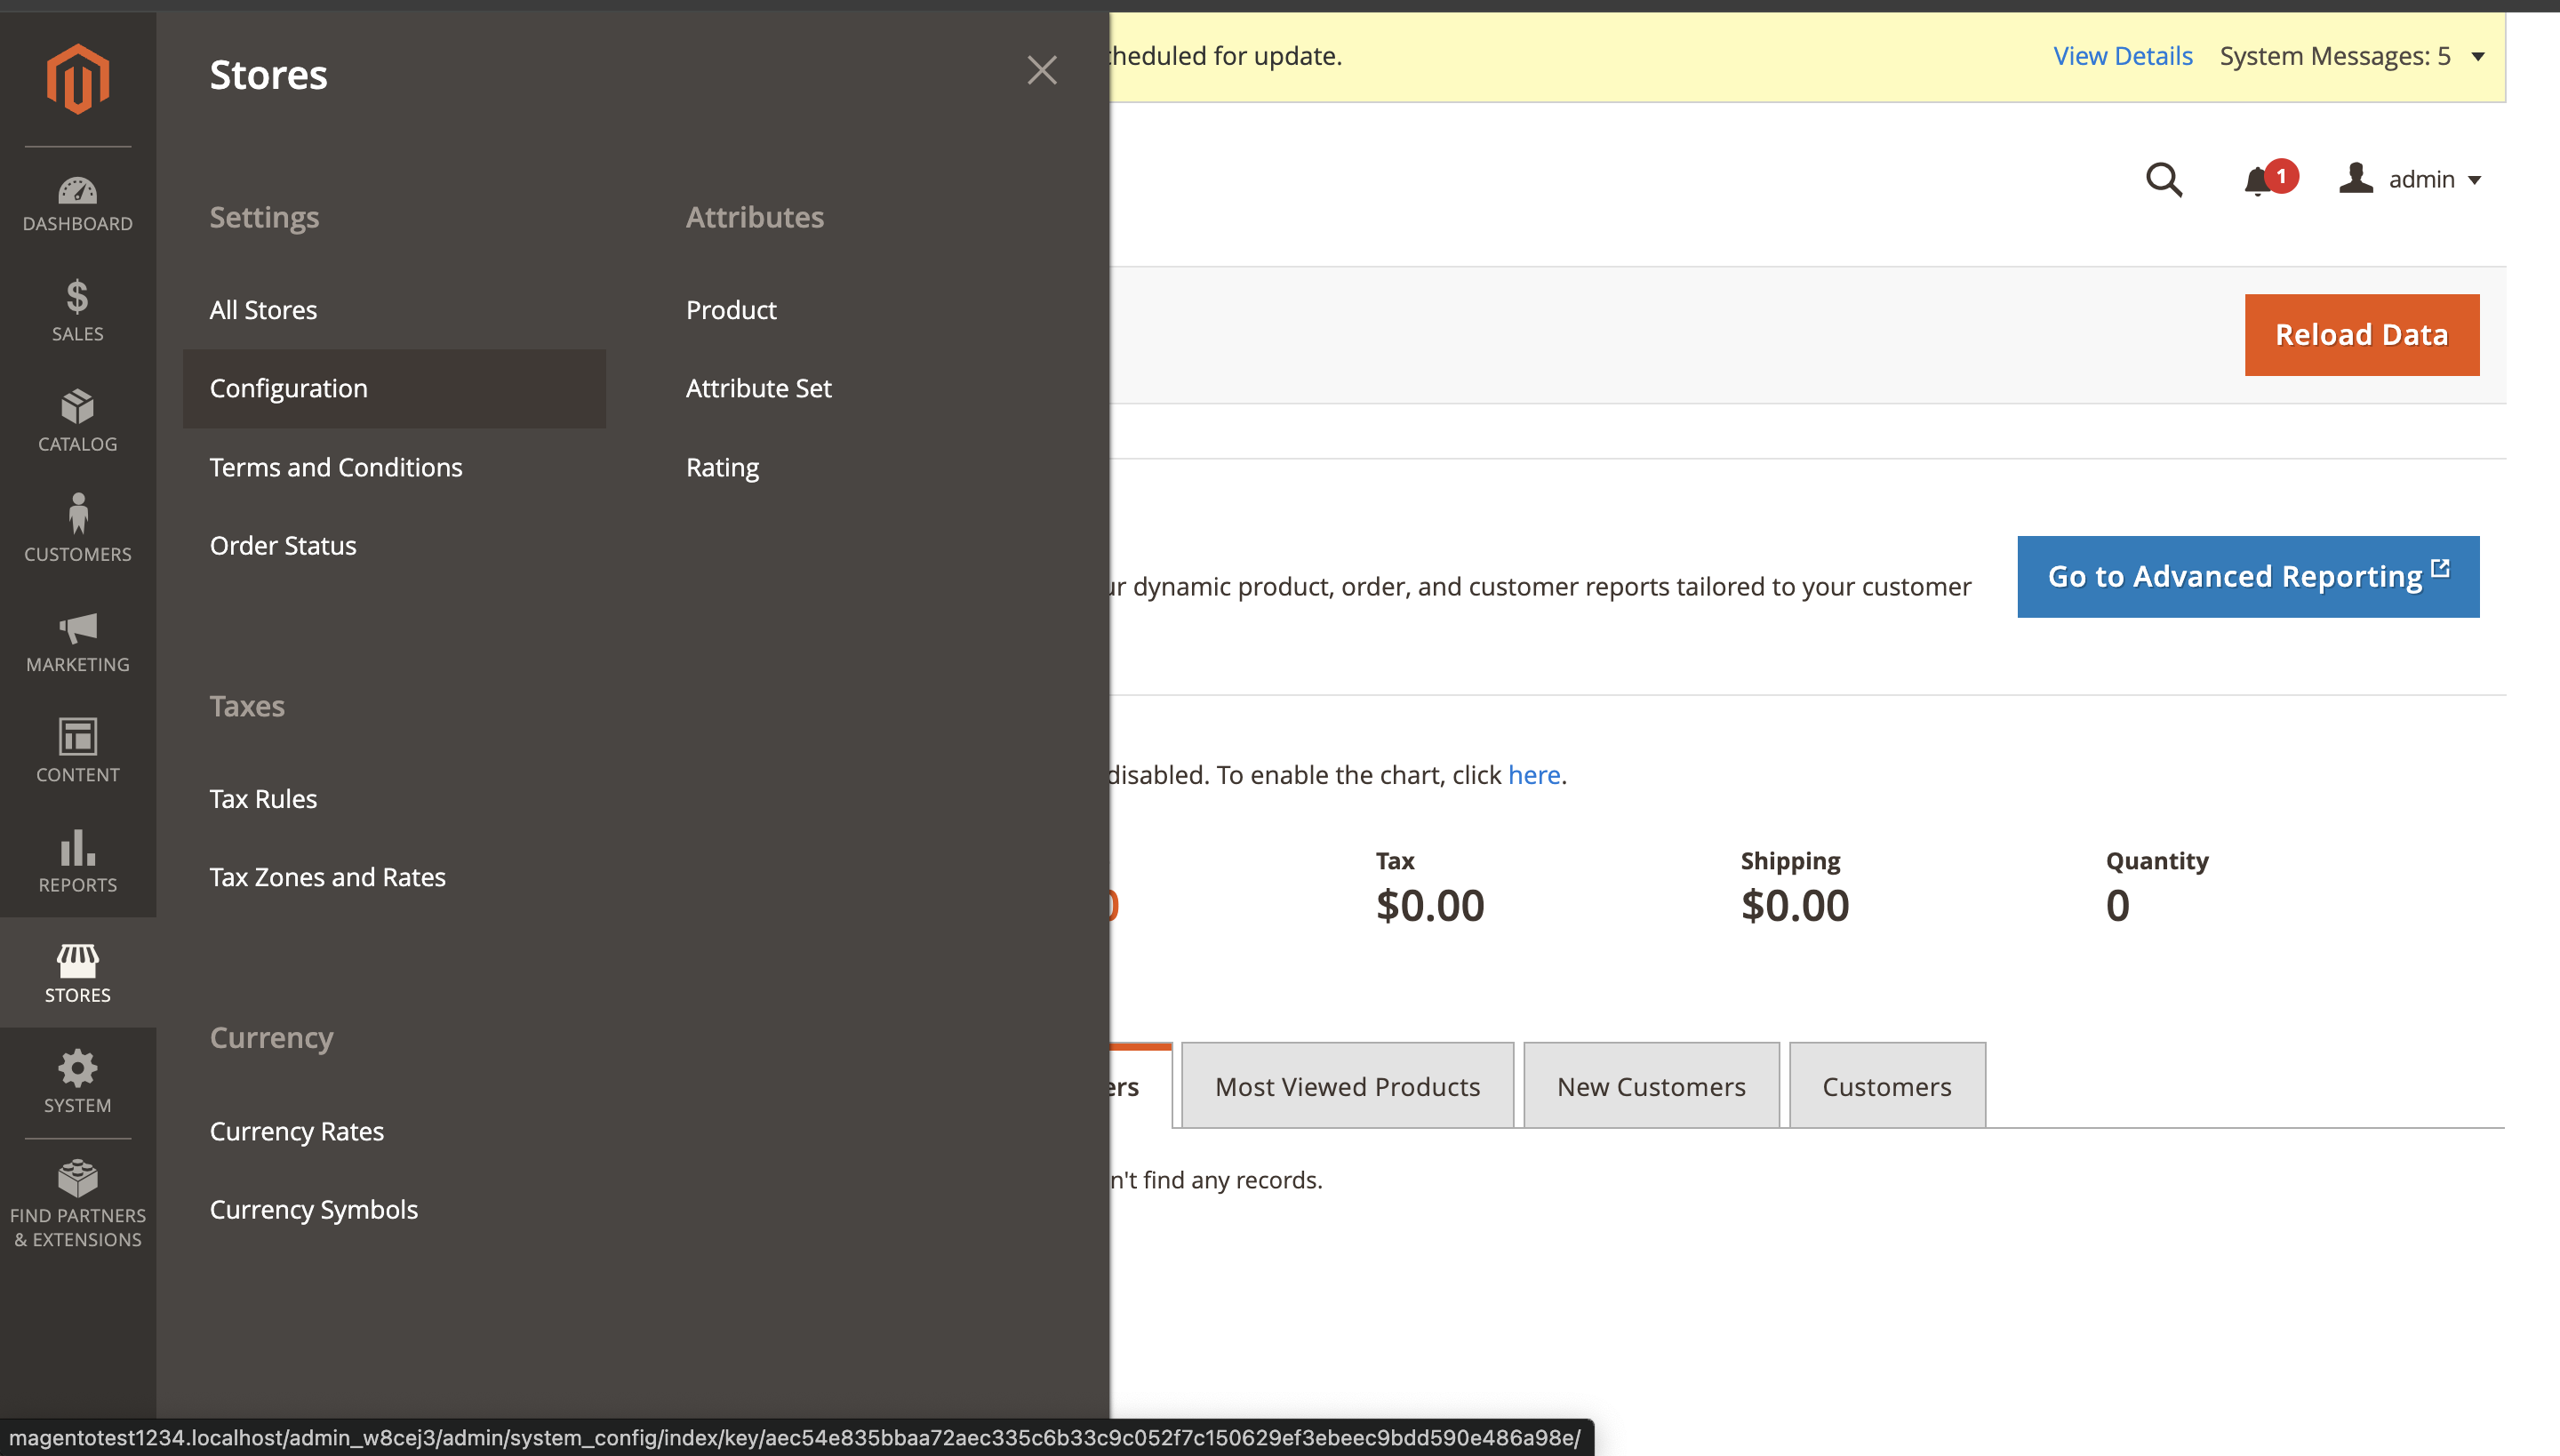
* After installing the Live2 extension, Obtain the authorization token provided by the Live2 team. Then, navigate to **Store -> Configuration.**

<figure><img src="https://files.gitbook.com/v0/b/gitbook-x-prod.appspot.com/o/spaces%2FHSKKq0QM2gaTSowM8icH%2Fuploads%2F3HwPjFj2SjrzLh68kZY4%2FScreenshot%202025-03-11%20at%206.28.44%E2%80%AFPM%20(1).png?alt=media&#x26;token=8e1bec81-6f85-4af7-90f5-f238b41f3474" alt=""><figcaption></figcaption></figure>

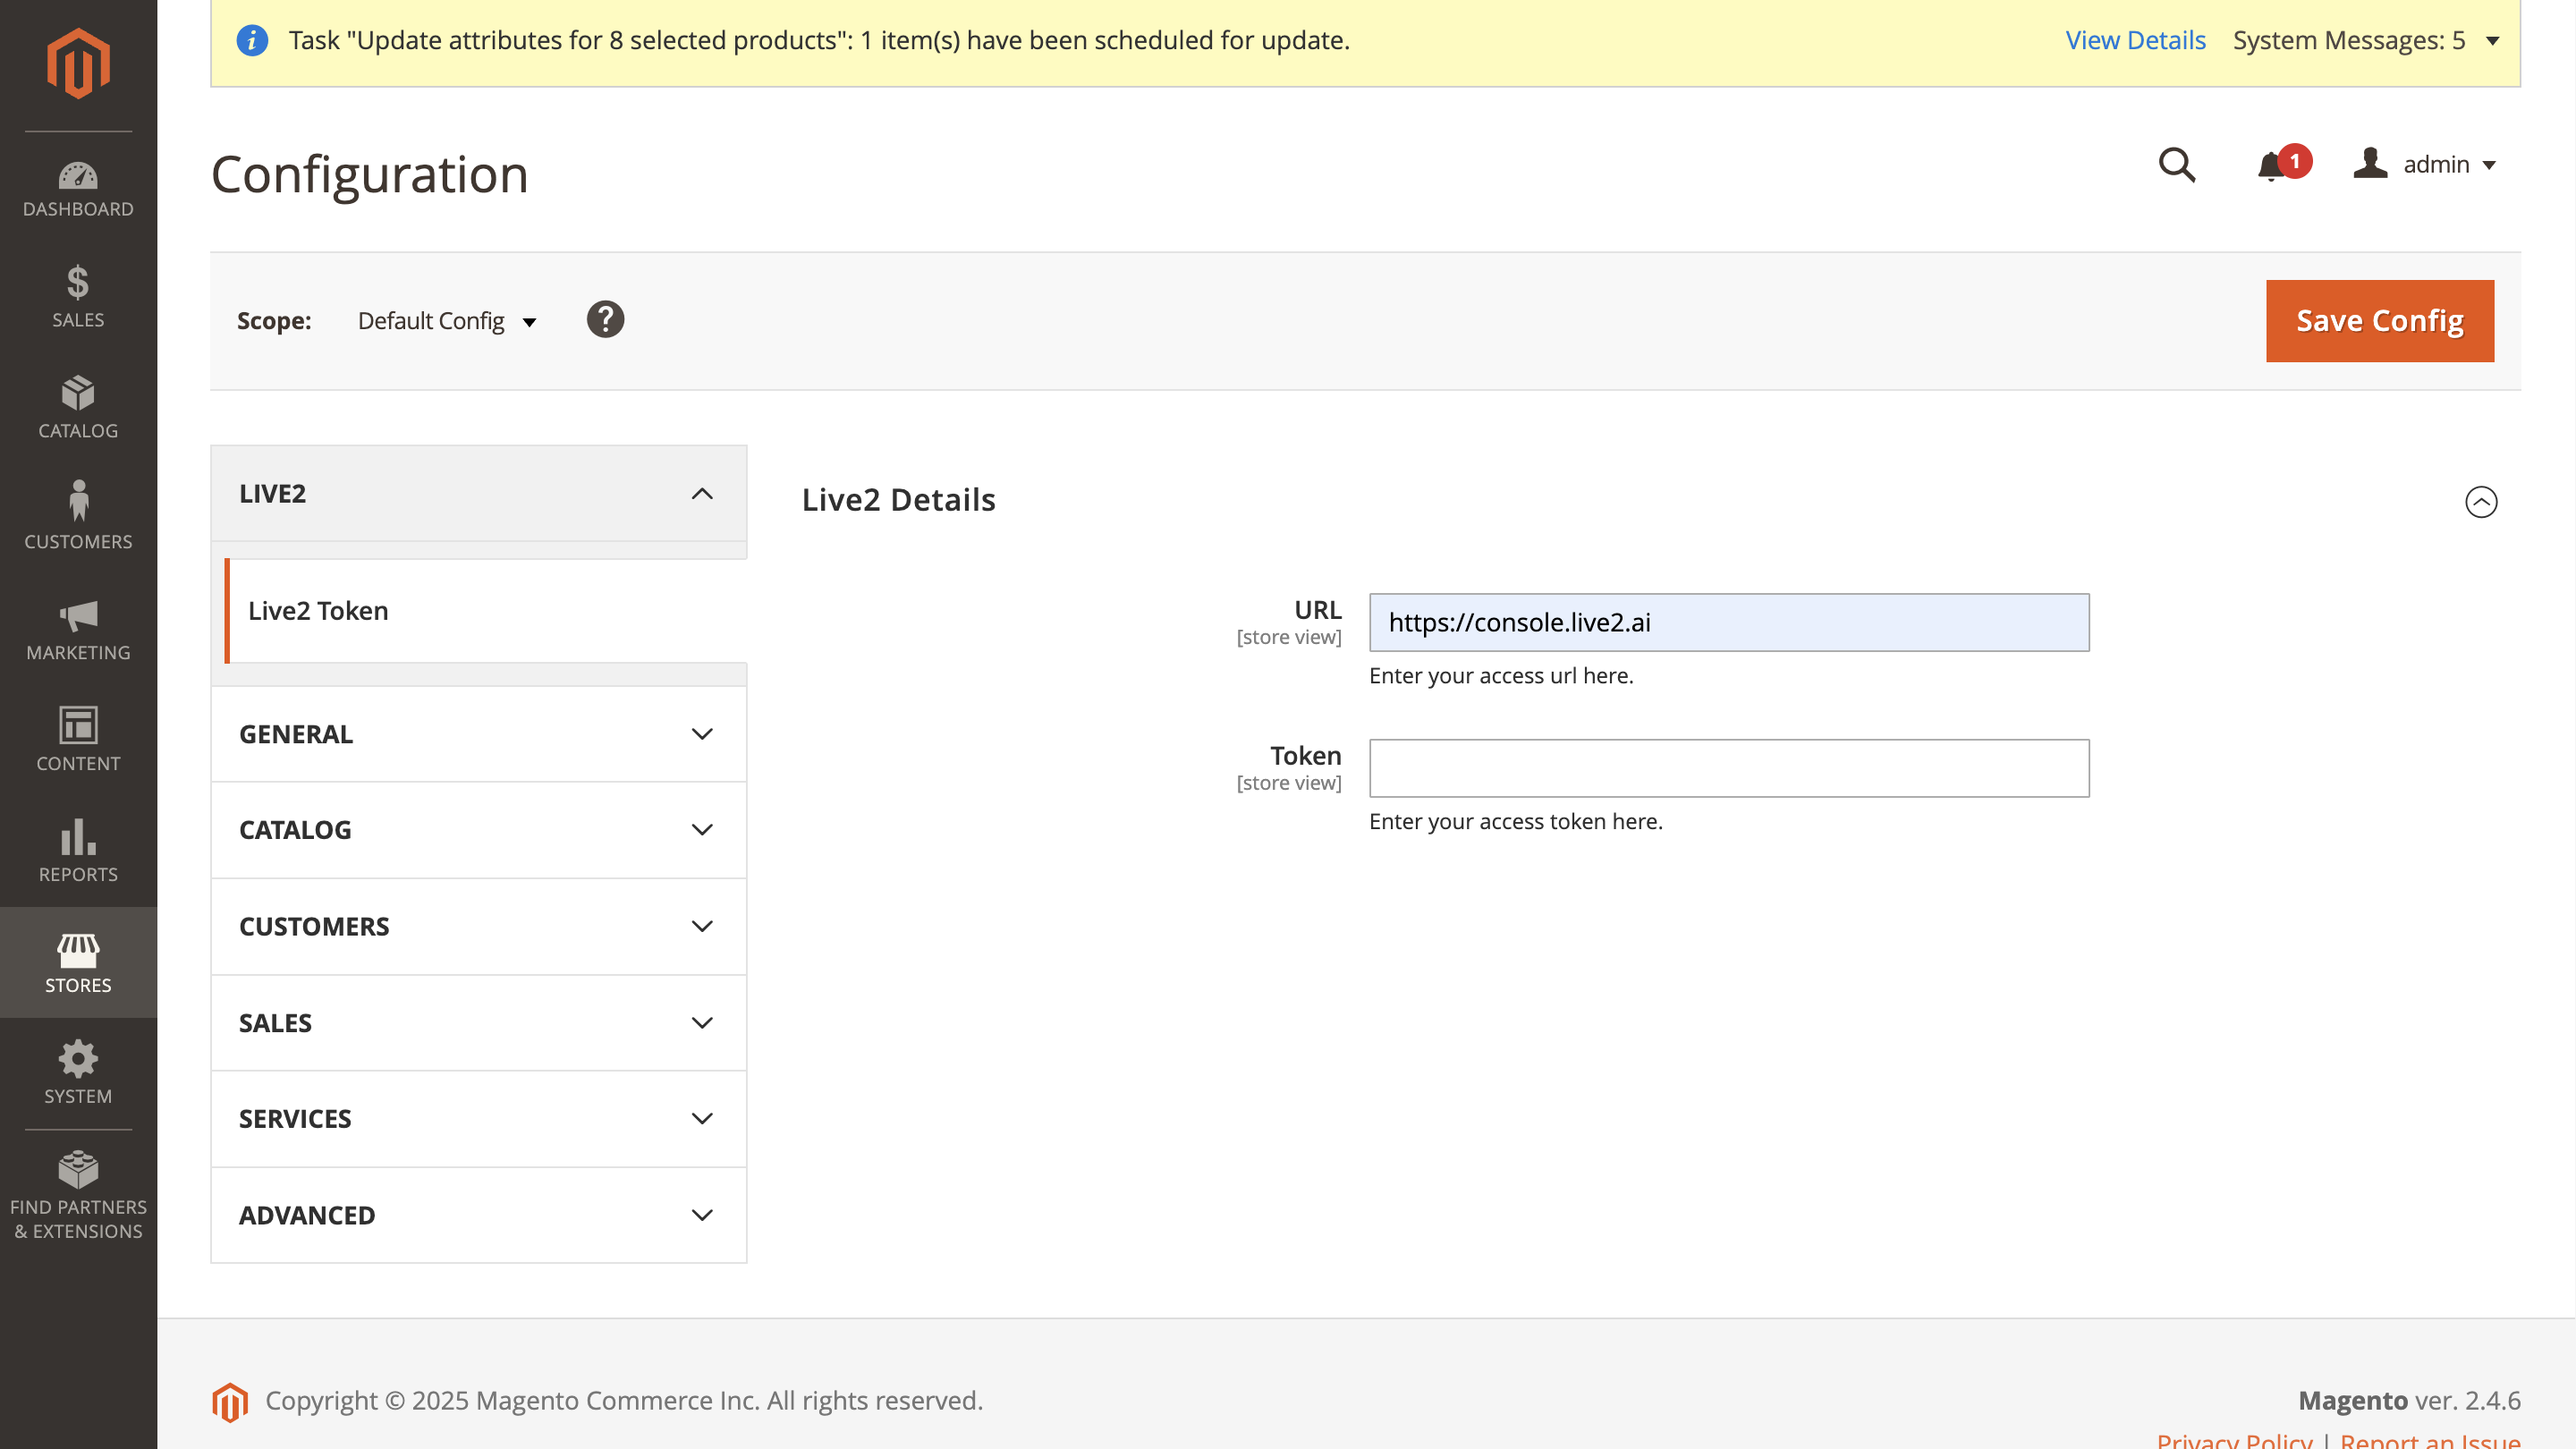
* Go to Live2 -> Live2 Token. In the URL enter [https://console.live2.ai](https://console.live2.ai/) and Token will be provided to you by Live2.ai at the time of integration.

<figure><img src="https://files.gitbook.com/v0/b/gitbook-x-prod.appspot.com/o/spaces%2FHSKKq0QM2gaTSowM8icH%2Fuploads%2F2p0PyHLTG6roQda2H12p%2FScreenshot%202025-03-11%20at%206.29.48%E2%80%AFPM%20(1).png?alt=media&#x26;token=a4a1a247-f690-48c2-a7f4-defaab016d42" alt=""><figcaption></figcaption></figure>

### Step 4: To Embed Videos follow these steps: <a href="#step-4-to-embed-videos-follow-these-steps" id="step-4-to-embed-videos-follow-these-steps"></a>

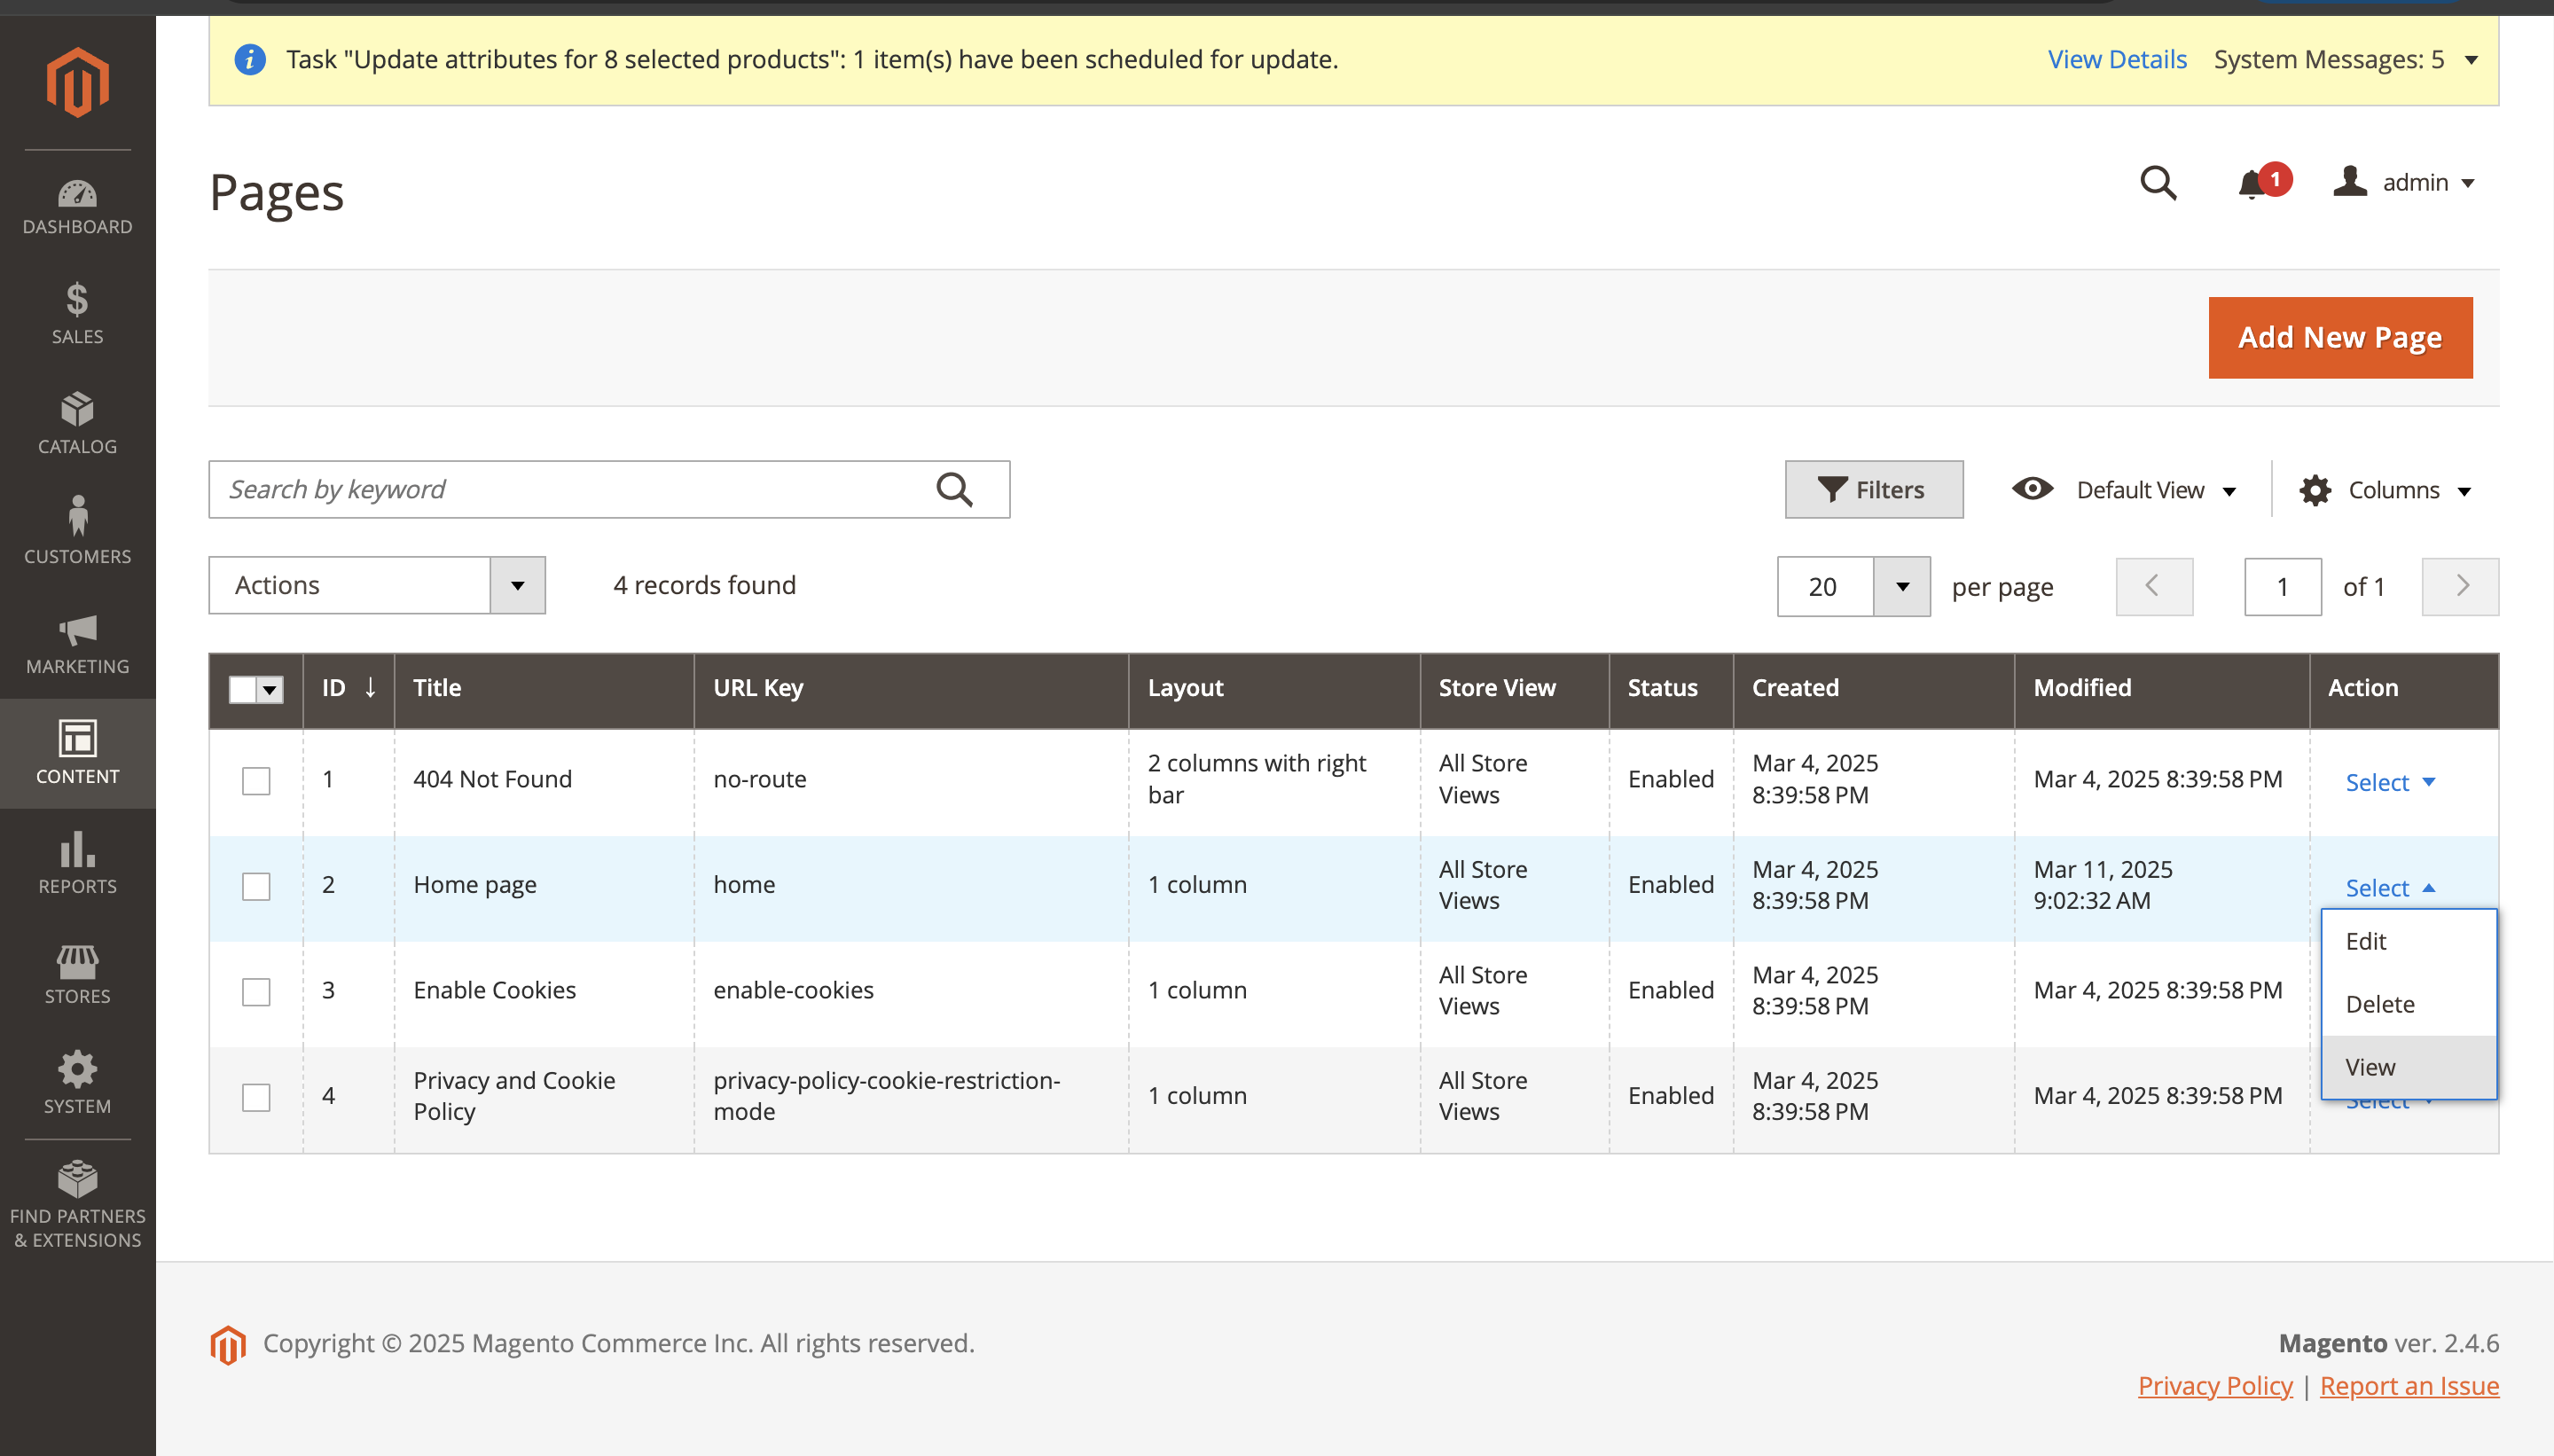
* Go to **Content -> Pages**

<figure><img src="https://2228314116-files.gitbook.io/~/files/v0/b/gitbook-x-prod.appspot.com/o/spaces%2FIKeumuJ1HB4kt3xN4NlD%2Fuploads%2FpHZ3aLwWlmDpoKXxxcPg%2FScreenshot%202025-03-11%20at%206.30.23%E2%80%AFPM%20(1).png?alt=media&amp;token=7309638a-d564-4f7d-8953-ee383106db43" alt=""><figcaption></figcaption></figure>

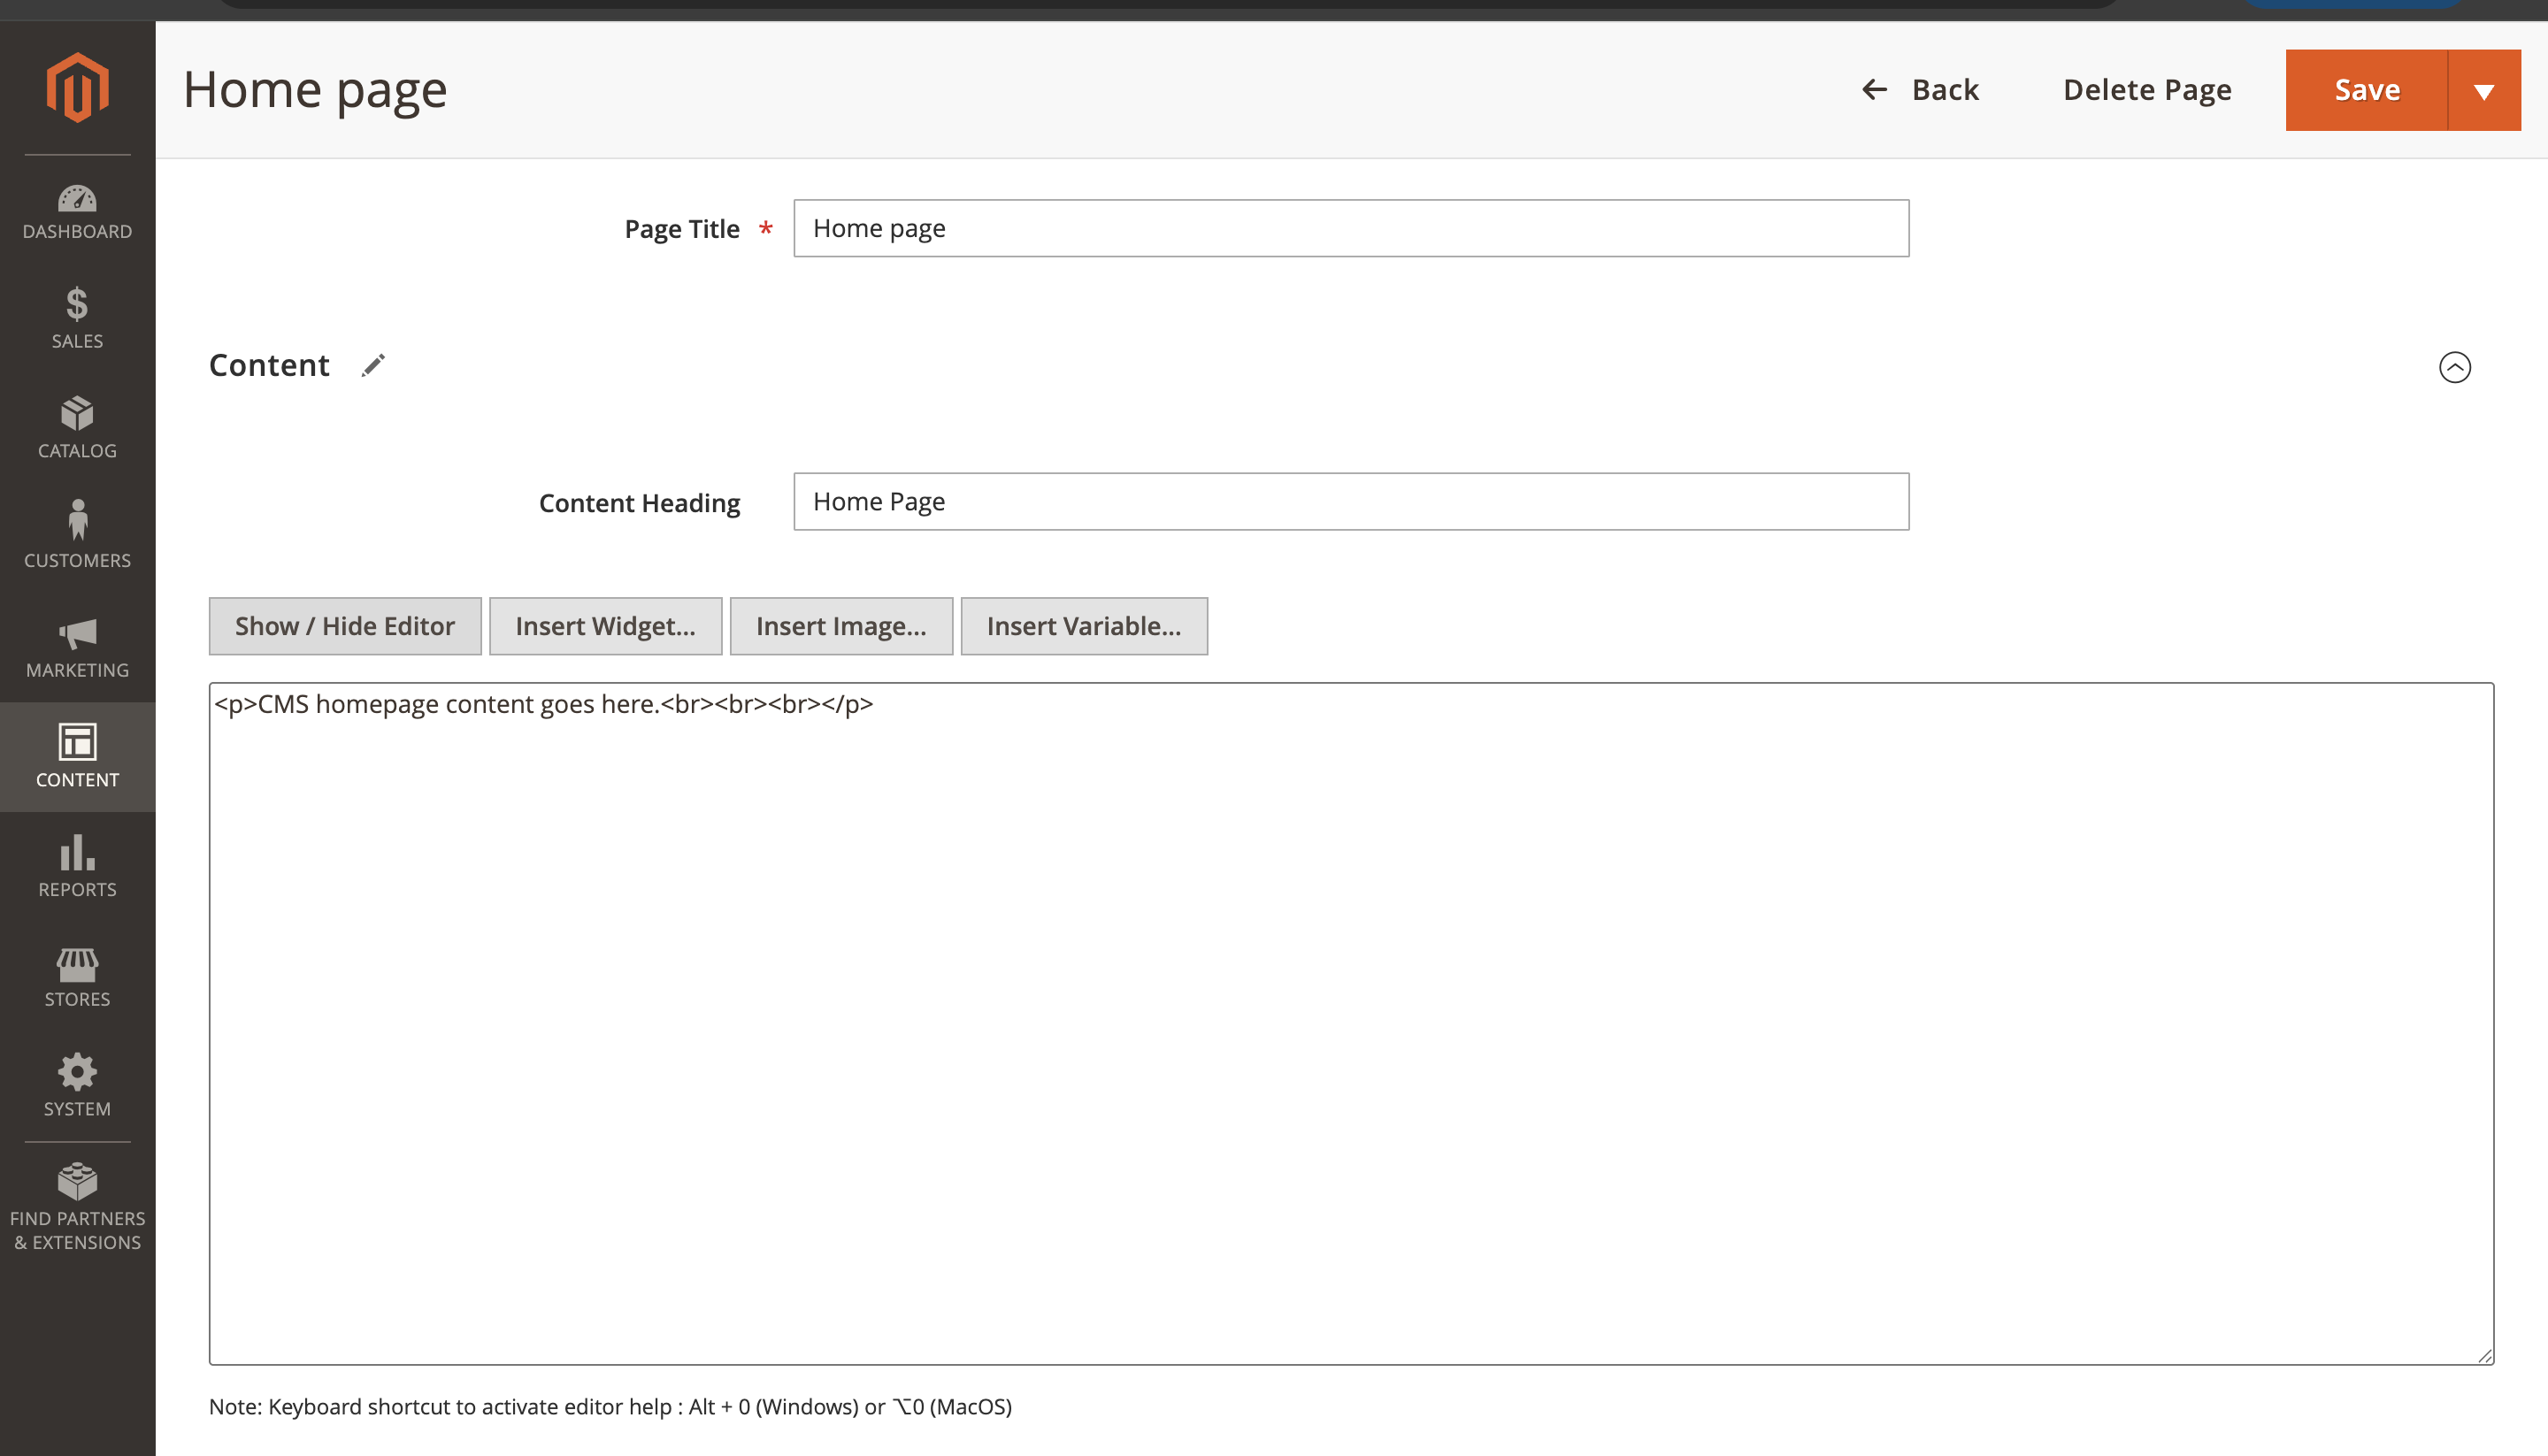
* Select the page where you want to embed the video, click on Edit. For this example we are considering Home Page

<figure><img src="https://2228314116-files.gitbook.io/~/files/v0/b/gitbook-x-prod.appspot.com/o/spaces%2FIKeumuJ1HB4kt3xN4NlD%2Fuploads%2Fx5tNLSlR1TmIv26Zl9XL%2FScreenshot%202025-03-11%20at%206.30.36%E2%80%AFPM%20(1).png?alt=media&amp;token=04939a37-b47f-4ef2-b264-889c182e5c27" alt=""><figcaption></figcaption></figure>

<figure><img src="https://2228314116-files.gitbook.io/~/files/v0/b/gitbook-x-prod.appspot.com/o/spaces%2FIKeumuJ1HB4kt3xN4NlD%2Fuploads%2FGxXyDI1uM9j3uQMOBYPn%2FScreenshot%202025-03-11%20at%206.30.56%E2%80%AFPM%20(1).png?alt=media&amp;token=9c23cfef-7679-425d-b45f-c0228ca955e5" alt=""><figcaption></figcaption></figure>

* Click on Content -> Click on Insert Widget

<figure><img src="https://files.gitbook.com/v0/b/gitbook-x-prod.appspot.com/o/spaces%2FHSKKq0QM2gaTSowM8icH%2Fuploads%2FB1J03tadiRYl72j3bdNc%2FScreenshot%202025-03-11%20at%206.31.48%E2%80%AFPM%20(1).png?alt=media&#x26;token=de53be2e-fa75-4fec-88c2-e532f05efc50" alt=""><figcaption></figcaption></figure>

* Select Live2 Widget from the dropdown, and enter the Embed Id generated from the Live2.ai console dashboard.

<figure><img src="https://2228314116-files.gitbook.io/~/files/v0/b/gitbook-x-prod.appspot.com/o/spaces%2FIKeumuJ1HB4kt3xN4NlD%2Fuploads%2FHtiv4YXFkk2NPdPXHryn%2FScreenshot%202025-04-09%20at%205.42.30%E2%80%AFPM.png?alt=media&amp;token=b4244176-c514-4fc8-86ca-06bbac7cb520" alt=""><figcaption></figcaption></figure>

* After the Widget is successfully added click on Save

<figure><img src="https://2228314116-files.gitbook.io/~/files/v0/b/gitbook-x-prod.appspot.com/o/spaces%2FIKeumuJ1HB4kt3xN4NlD%2Fuploads%2F1dbGAPBwIIKAoyYwpVrE%2FScreenshot%202025-04-09%20at%205.43.46%E2%80%AFPM.png?alt=media&amp;token=e68c6821-1cf8-438f-ac2e-815a93422c5e" alt=""><figcaption></figcaption></figure>

* Go to Content → Pages. Click on View for the page the embed was created.

<figure><img src="https://files.gitbook.com/v0/b/gitbook-x-prod.appspot.com/o/spaces%2FHSKKq0QM2gaTSowM8icH%2Fuploads%2FXQgRxrmqtTFdJwbe98zN%2FScreenshot%202025-03-11%20at%206.32.58%E2%80%AFPM%20(1).png?alt=media&#x26;token=7e96fd1d-9f8d-4b21-a4cb-f2e89d1b1aba" alt=""><figcaption></figcaption></figure>

* You will be able to see the preview of the live embed

<figure><img src="https://2228314116-files.gitbook.io/~/files/v0/b/gitbook-x-prod.appspot.com/o/spaces%2FIKeumuJ1HB4kt3xN4NlD%2Fuploads%2FLM9ff5yh4KgdNRBxZA6m%2FScreenshot%202025-04-09%20at%205.46.51%E2%80%AFPM.png?alt=media&amp;token=5a9c4911-0d0e-4910-9c05-bf125a0a33f7" alt=""><figcaption></figcaption></figure>

### Step 5: Enable Product Sync

Enable the product synchronization feature to sync your catalog with Live2. Run the following command:

```
bin/magento live2:productSync
```